scroll for more
scroll for more
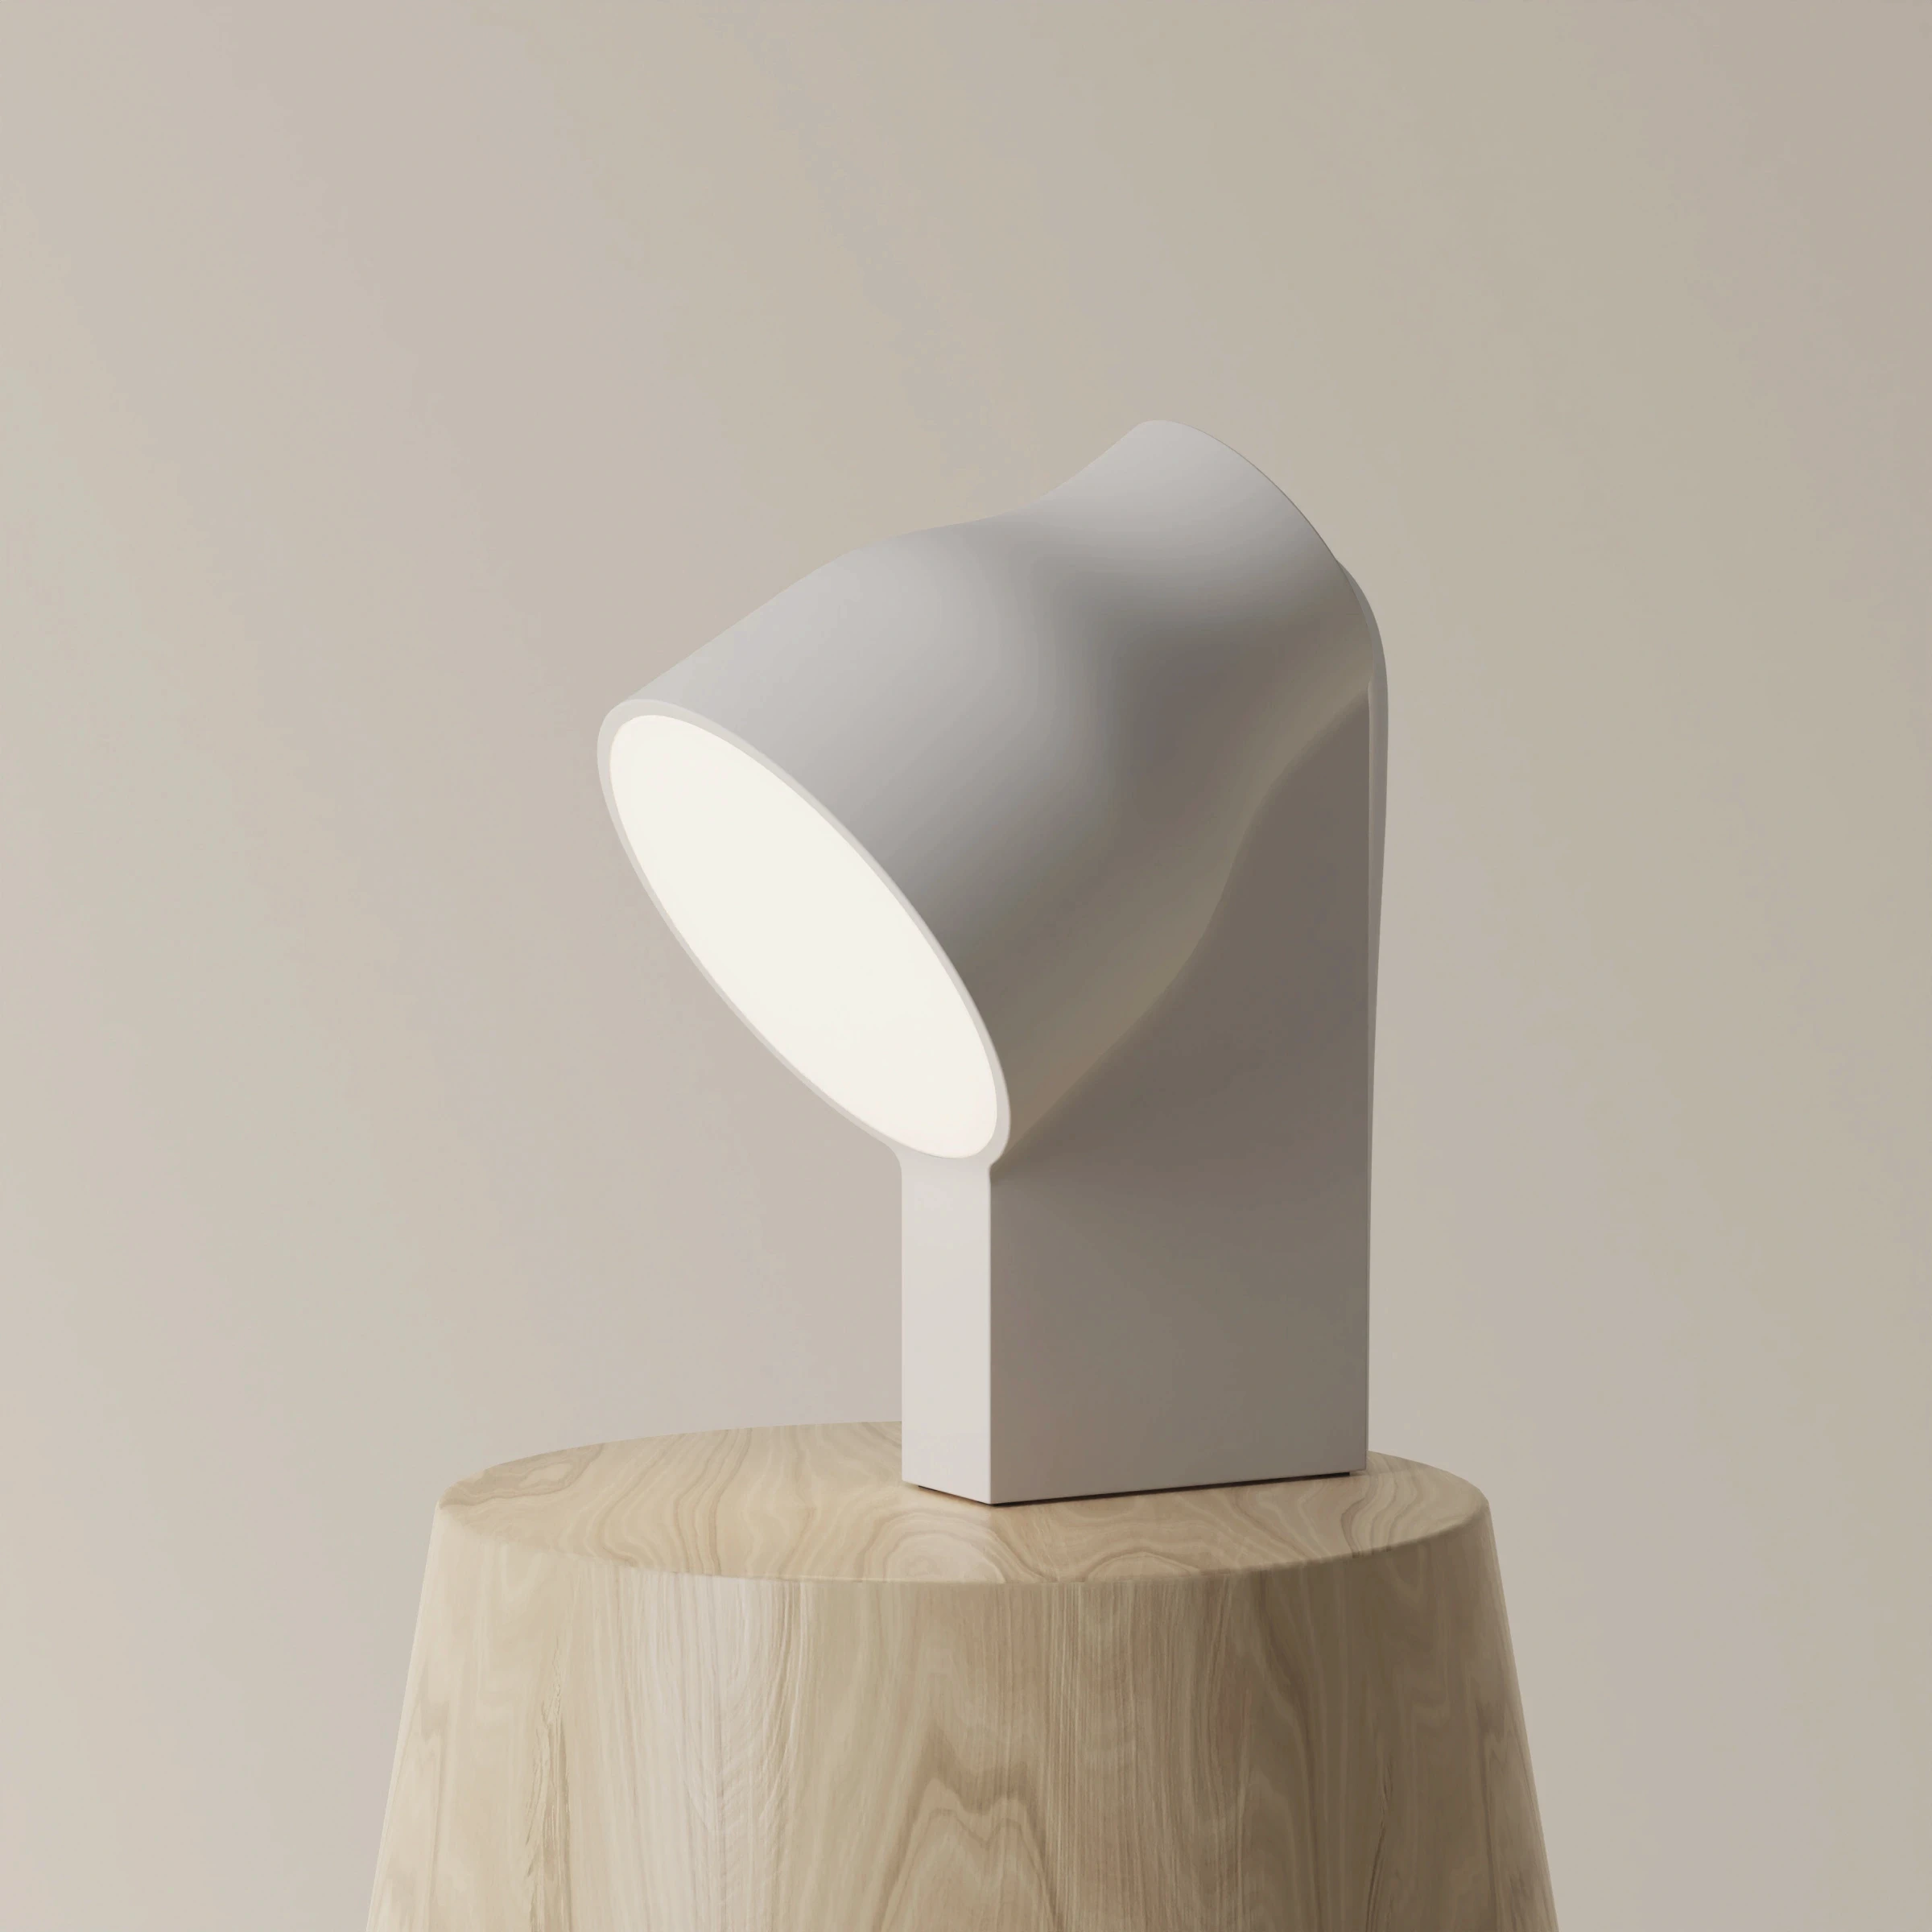
In this project, I will reproduce the Encore Table Light, originally designed by Sam Gwilt.
As this is a replication project, the process omits normal steps such as market analysis, ideation sketches, and various explorations.
Instead, early steps will include analyzing the product's shape, color, and form for understanding.
Right: Example Render, courtesy of Sam Gwilt and and Gantri.com.

Shape
Color
Texture
Product Analysis
The Encore Table Light consists of a rounded rectangular lampshade and a rounded base.
The shade’s length is double the width of the base.
It’s pill-shaped, where the surface gradually transitions from a smooth top edge to a wavy bottom edge.
The base is a “squircle,” with congruent sides that mimic a circle’s curves. It appears to extend above the lampshade’s top edge.
Together, these components create a dramatic yet passive tone.


This Encore Table Light is finished with a warm caramel color known as "Sedona."
Aside from the light diffusing plates, the entire body of the lamp is colored in the dark orange color.
With a warm, 3000K lightbulb, the light emits a bright and cozy glow. The warmer temperature complements the color of the lamp itself.
The lamp exudes warmth, comfort, and subtleness, which contributes a warm and natural feeling to the surrounding environment.


The Encore Table Light features a matte finish that is unreflective and visually unobtrusive. The subtle surface texture negates reflective glare and allows the product to blend naturally into surrounding spaces.
The smooth ridges around the bottom edge of the lampshade are rounded. These add visual flare while maintaining a smooth appearance and feel.
The continuous matte surface across the entire form with gradual ridges contribute to the modern, statement-piece feel of this fixture.


Encore Table Light
Process Book
1
Planning

I chose 3D printing for the needed precision and flexibility in this project.
I settled on a sequence-based assembly design for adhesive-free assembly.
I took inspiration from the actual internal structure of the light, shown in this lightbulb changing procedure.
I observed:
A step-based assembly
Modular components
Right: Courtesy of Sam Gwilt and Gantri.


2
Design • Structure
All components were designed to assemble without interrupting the existing exterior design.
I used the .usdz 3D mesh file available on Gantri's product listing, originally for augmented reality use, to help CAD model the exterior.
Autodesk Fusion
Default and Exploded Views


Design - Structure
The Base
This component supports the upper half of the light fixture.
I designed a centralized interface of slots.
Attachment to the base is secure, discreet, and invisible to the outside.
Slotting Breakdown
Red: midbody
Blue: lightbulb cradle
Purple: light diffusing plate and lightbulb cradle
Design - Structure
The Midbody
Hidden from outside view, this internal chassis serves as the structural backbone of the entire fixture.

Slotting Breakdown
Purple: light diffusing plate and cap
Orange: lampshade and cap (stacking)
Green: lampshade
Red: base


Design - Structure
The Lampshade
The centerpiece of this light fixture uses a secure three-point connection with the midframe.

For balance, the center of mass was designed to sit above the base.

Bottom view

Top view
Design - Structure
The Cap
To "top" things off.
Secures the upper light diffuser plate, its clips, and seamlessly hides the midbody.

As the midframe accommodates the lampshade and cap in the same slots, the cap further secures the lampshade in a space-efficient way.

This structure supports the components that reinforce the structure and allow this light fixture to be functional.
The following section describes their design and function.
3
Design • Components
Design - Components
Upper Light Diffuser and Clips

Due to weight distribution, the light diffusing plate requires additional fixation when installed.
Before the cap is installed, the plate is secured by the midframe's slot and a pair of clips.


The cap secures the plate and prevents the clips from falling out.

Each clip "sandwiches" the plate and the midframe.
Design - Components
Lower Light Diffuser and Lightbulb Cradle
The bottom light diffuser plate is installed directly onto the base.
The lightbulb socket is fitted into a cradle component that slots into the base while also holding the lower plate down.


4
3D Printing
Using a Creality K2 Plus with PLA filament.
Knowing I would prime and paint externally-visible components, I was not particular about filament color choices.

Midbody

Base (attempt 2)

Lampshade and Cap
There's layers to 3D-printing. (pun intended)

Support and Brim Removal
I used a box cutter to clean up my printed components.
Lesson learned:
Base, first attempt:
I initially designed relatively huge overhangs, causing issues.

Adjusted accordingly:
I resolved this issue by minimizing horizontal overhangs.

5
Light Diffuser
Manufacturing


Outlines drawn in Autodesk Fusion.
Converted into .dxf files for laser cutter use.
Left to Right: Bottom Diffuser and Top Diffuser
The three images below are taken from my Carve Table Light project, which shared an identical frosting process.
Due to time constraints, I was not able to photograph the process for this project :(

Laser cutting
Cut size set to 0.1mm smaller than its intended space for tight friction fitting.

Disk sanding
Using a fine-grit disk sander to frost both sides. Rinsing in between.

Finish
Effectively diffuses light while being smooth to the touch.
6
Surface Finishing • Priming
Manufacturing

To begin the surface finish, I repeatedly used Rust-Oleum’s 2-in-1 Primer+Filler, 320-grit sandpaper, and filler paste.
Repeated priming and sanding with finer sandpaper resolved most surface imperfections.
Challenges:
Layer lines remaining visible.
Sanding around ridges.


6
Surface Finishing • Painting
Manufacturing

I used Rust-Oleum’s “warm caramel” satin spray paint to color the lamp.
Similar to priming, painting required multiple coats for solid color and sanding in-between coats for a flawless finish.


6
Surface Finishing • Final Touches
Manufacturing

Lightbulb
A standard A19-type bulb, E26 socket, 40W (adjustable), 3000K (adjustable).
I recolored the midbody interior with white paint to prevent orange color from showing through the diffuser.
Preventing unintentional colors


Clear coating
I applied a matte coating for surface protection and additional matte texture.


end of this process book
(currently unavailable) view this process book as a pdf